December 8, 2025
Building a concrete pathway is a crucial part of enhancing property functionality and aesthetic appeal. A well-constructed pathway ensures accessibility, safety, and longevity while complementing surrounding landscapes or architectural designs. From understanding the basics to addressing post-construction considerations, this guide walks through each stage of the process.
1. Understanding the Basics
1.1 Knowing Types of Pathways
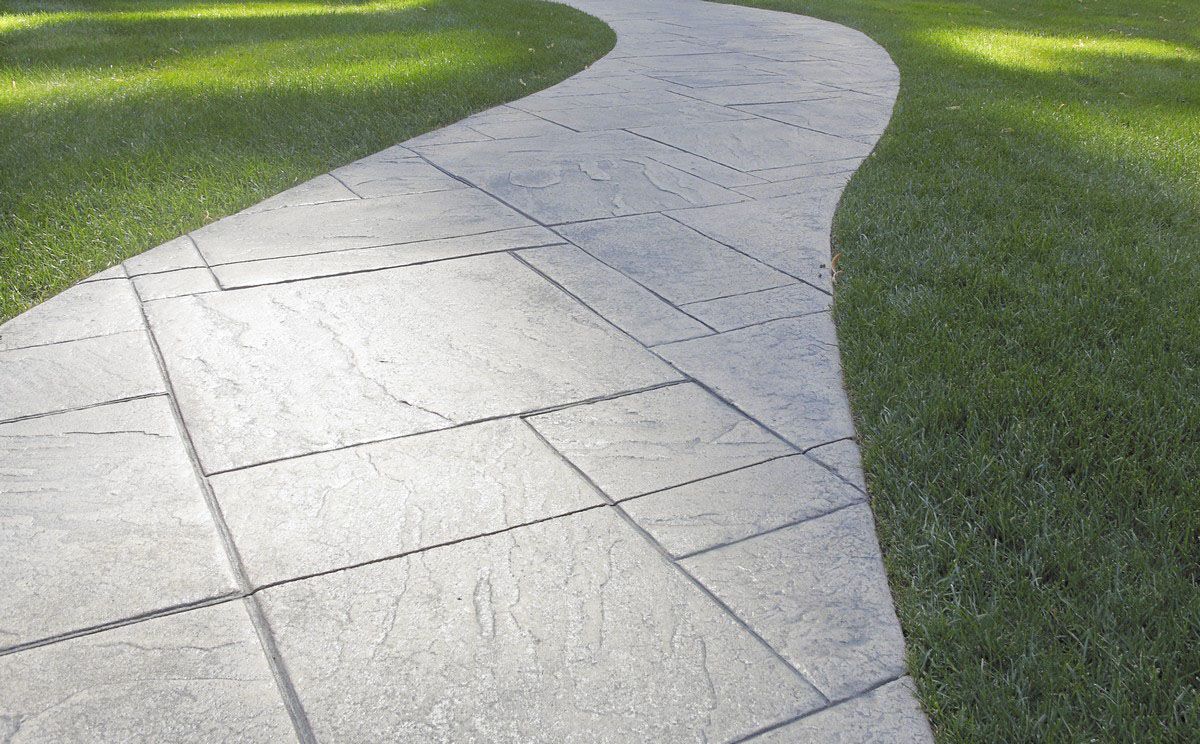
Metered concrete pathways come in various styles, each suited to different needs and site conditions. The most common include standard walkways, decorative stamped concrete paths, and reinforced access routes. Standard walkways provide a smooth, practical route between outdoor areas, ideal for residential lawns or gardens. Stamped concrete offers aesthetic appeal by imitating materials like stone or brick while maintaining the strength of concrete. Reinforced pathways are designed for heavier traffic, such as driveways or garden equipment routes, providing added durability and load-bearing capacity.
1.2 Understanding Key Components
A durable pathway consists of several critical elements that work together for strength and longevity. The sub-base provides a stable foundation that supports the concrete layer, preventing cracking or settling. Reinforcement materials such as rebar or wire mesh increase tensile strength, while expansion joints allow flexibility and prevent stress fractures. Finally, proper drainage grading ensures water flows away from the pathway’s surface, reducing erosion and damage. The quality of each layer directly impacts the overall performance of the pathway, making careful construction essential. When all components are installed correctly, the result is a smooth, resilient surface built to withstand years of foot traffic and weather exposure.
1.3 Learning Importance of Soil Testing
Soil testing is essential before pouring any concrete pathway. Different soil types—such as clay, sand, or loam—affect how the ground reacts under pressure and moisture changes. Testing helps determine whether compaction or additional gravel layers are needed to stabilize the base. Ignoring soil quality can lead to uneven settling and cracks over time. With accurate soil data, contractors can adjust designs for improved drainage and long-term performance.
2. Planning Considerations
2.1 Assessing Conditions
Thorough site assessment ensures your pathway performs well and looks great. Evaluate the topography, drainage patterns, and intended use of the area. Steep slopes may require retaining edges or textured finishes for traction, while low-lying areas might need sub-surface drainage solutions. By identifying potential erosion risks or moisture retention zones early, builders can prevent costly repairs later and ensure stability across changing weather conditions.
2.2 Choosing the Right Design
Pathway design plays a major role in both function and visual appeal. Consider the pathway’s width, curvature, and finish texture to complement your outdoor layout. You will need a width that is several feet wide to account for foot traffic, and if needed, even wider to accommodate wheelbarrows or bicycles. Decorative finishes such as stamped, broomed, or exposed aggregate concrete can elevate the appearance. Consulting with landscape designers or concrete professionals ensures the final product balances utility, cost, and aesthetics.
2.3 Calculating Material Needs
Accurate material calculation is vital for both budgeting and consistency. Metered concrete ensures precise delivery by volume—typically measured in cubic yards or meters—so ordering the correct amount prevents waste. You’ll also need to factor in materials for reinforcement, formwork, and expansion joints. Overestimating increases cost, while underestimating can interrupt the pour. Careful measurement and planning help maintain quality and avoid uneven sections in the finished pathway.
3. Preparing the Site
3.1 Excavating and Grading
Proper excavation creates the foundation for a long-lasting pathway. Begin by clearing grass, roots, and debris from the designated area. Excavation depth depends on intended use. The site is then graded to promote drainage away from the surface. A compacted gravel sub-base follows, ensuring even support and minimizing future settling. Correct grading prevents puddling and extends the lifespan of the concrete surface.
3.2 Setting Up Drainage
Effective drainage prevents cracking and heaving caused by standing water. Slight slopes should be built into the design to encourage runoff. Waterproof membranes can be used in high-moisture areas for added protection. A well-drained base ensures your pathway remains level, stable, and free of freeze-thaw damage.
3.3 Laying Out Pathway Lines
Accurate layout ensures your pathway aligns with your design and surroundings. Mark the boundaries using stakes and string or spray paint to outline the desired shape. Curved pathways should be carefully measured to maintain smooth, natural lines. Use laser or bubble levels to verify even grades across the entire route. Precise layout not only improves appearance but also helps maintain uniform thickness during the pour.
4. Building the Formwork
4.1 Selecting Materials
Formwork defines the shape and edges of your pathway. Common materials include wood, steel, or plastic edging systems. Wooden boards are cost-effective and flexible for curves, while steel and plastic forms are more durable and reusable. For decorative pathways, flexible edging materials help achieve smooth contours. Whatever the choice, forms must be strong enough to hold metered concrete without bowing or leaking.
4.2 Constructing the Formwork
Once materials are selected, builders secure them along the marked lines using stakes and braces. The forms should be level and aligned to the planned slope. Proper reinforcement prevents shifting during pouring, which could alter the pathway’s shape or thickness. Checking alignment multiple times before pouring ensures a precise, professional finish.
4.3 Reinforcing with Rebar or Mesh
Reinforcement prevents cracking and increases pathway strength. Steel rebar or welded wire mesh is embedded within the concrete at mid-depth to absorb tension. This reinforcement is especially important for long or wide paths exposed to temperature fluctuations. By following engineering specifications for spacing and placement, you can extend the pathway’s lifespan and maintain structural integrity under frequent use.
5. Mixing and Pouring Concrete
5.1 Understanding Ratios
The strength and workability of your pathway depend on proper mix ratios. Typical concrete mixes for walkways use a specific ratio of cement, sand, and aggregate. Water content must be controlled carefully to achieve the right consistency. Metered concrete delivery simplifies this process by ensuring consistent proportions from start to finish. Strong, well-balanced mixes resist cracking and surface wear over time.
5.2 Strategizing Large Pours
For long or wide pathways, strategic pouring is essential. Metered concrete allows for precise batch control, minimizing waste and improving flow consistency. Large pours should be completed in sections to prevent premature setting. Crews can use wheelbarrows, chutes, or pumps to distribute the mixture evenly. According to Family Handyman, unloading typically takes 7–10 minutes per cubic yard—so plan manpower accordingly. Sectional pouring reduces cold joints and helps achieve smooth, cohesive results.
5.3 Using Concrete Vibrators and Finishing Tools
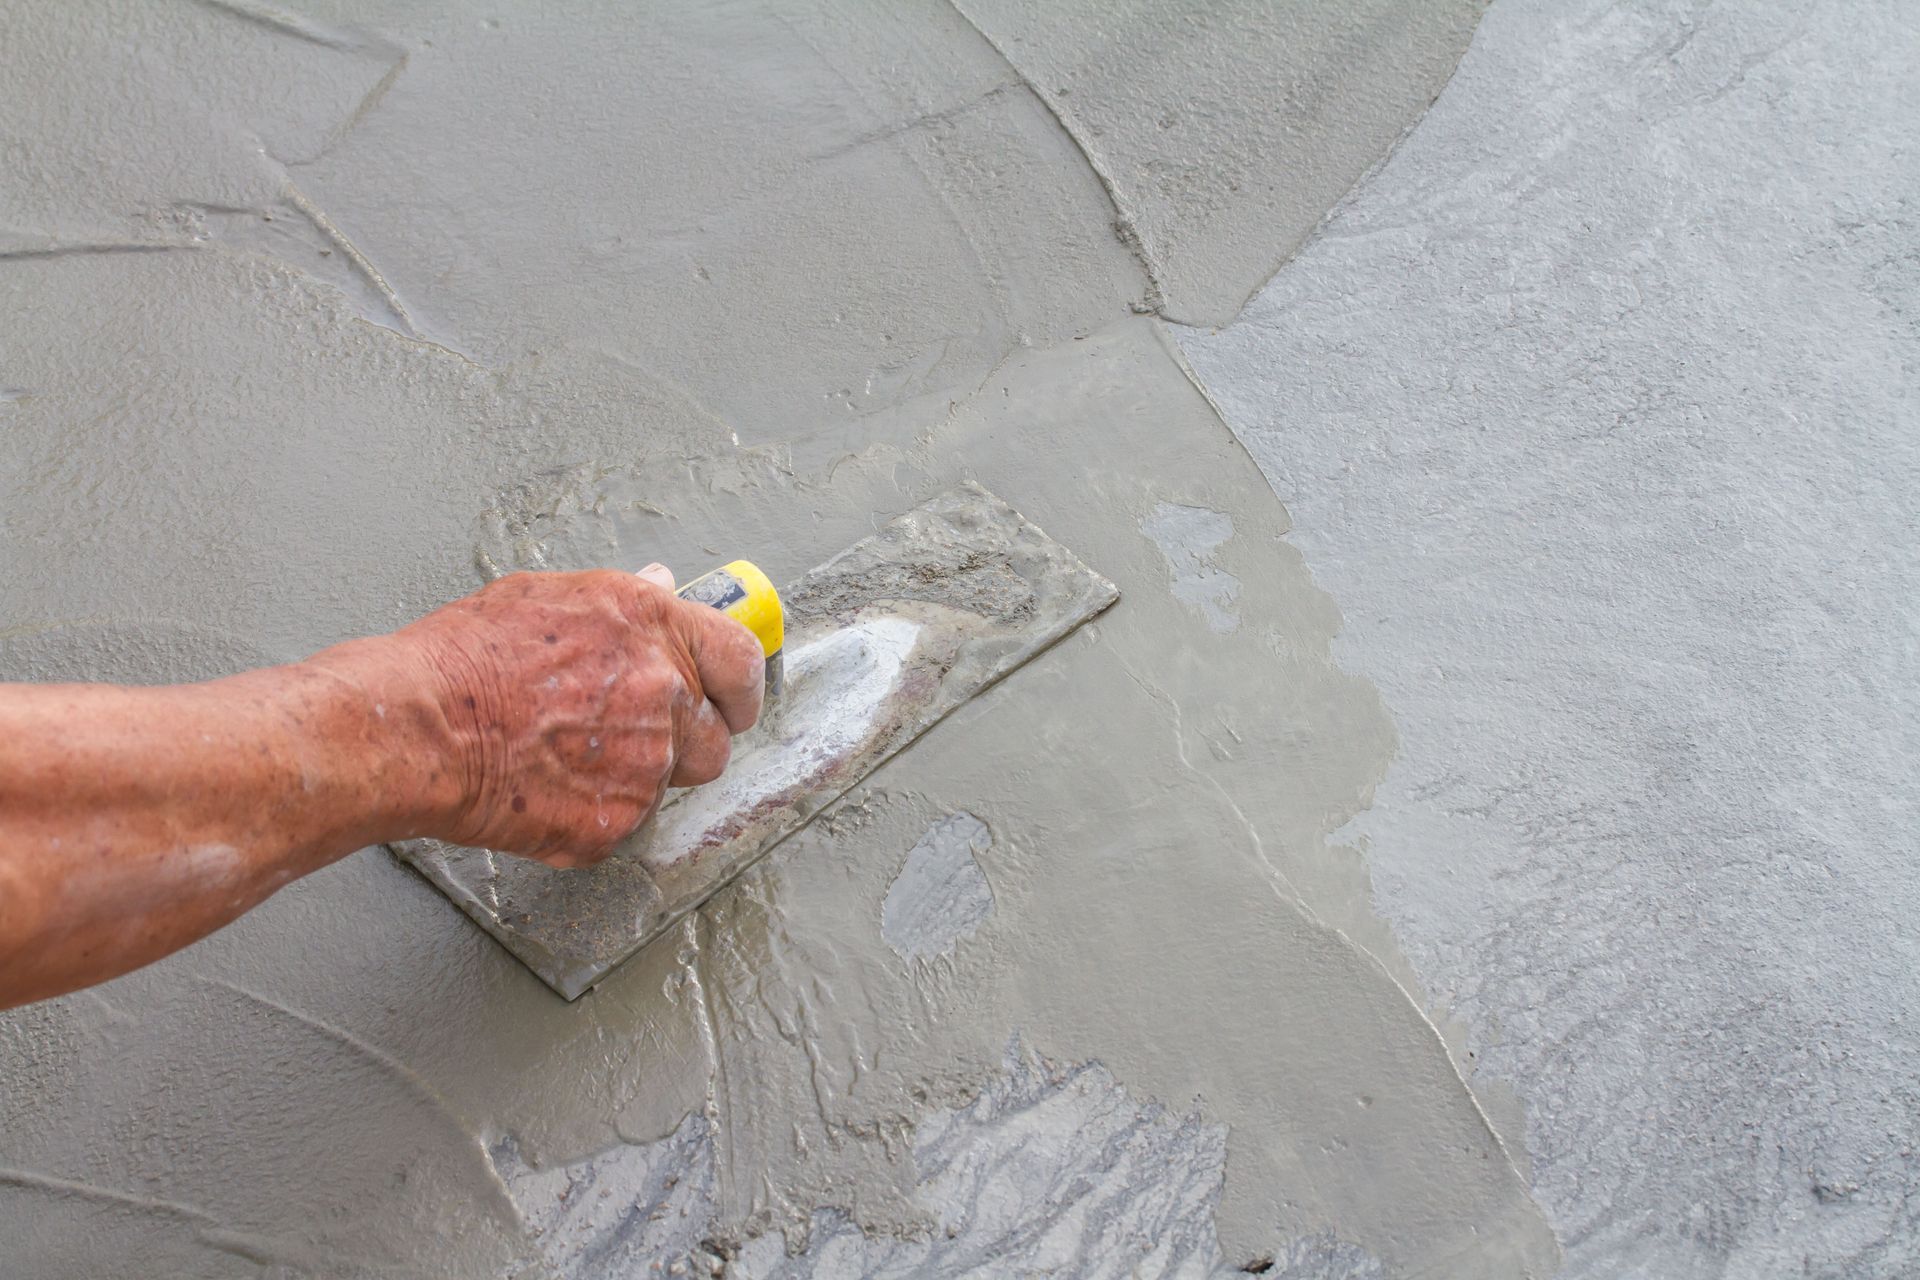
Concrete vibrators eliminate trapped air pockets, ensuring a dense, uniform surface. Vibrate the mixture at regular intervals, avoiding over-vibration, which may cause segregation. Once the concrete has settled, use a screed to level the surface, followed by trowels or brooms for finishing texture. Decorative finishes or color hardeners can be applied at this stage. Proper finishing not only enhances appearance but also increases traction and durability.
A well-built metered concrete pathway enhances both function and curb appeal. By focusing on proper planning, soil testing, drainage, and reinforcement, you can create a surface that withstands weather, weight, and time. Each phase, from site preparation to finishing, plays a critical role in achieving lasting quality. Whether you’re improving a garden walkway or installing a heavy-duty access path, the right techniques ensure stability and style for years to come. If you’re ready to install a professional metered concrete pathway, contact Artistic Materials Inc. today to begin your project with precision and care!